 Select MIDAS main menu => Experiment Control
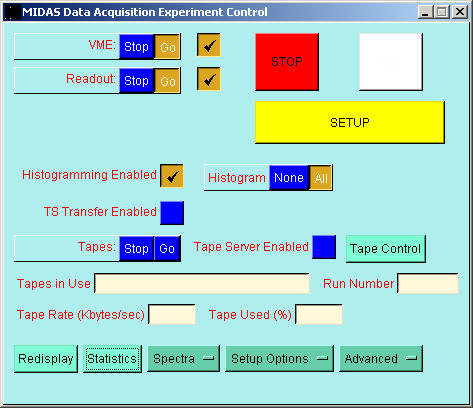
You can now click on the SETUP button and select Setup Everything. If your configuration previously is correct the data acquisition system will be now be ready for execution.
Many things can go wrong at this stage. Click here for a list of common problems.
Click on the GO button to start data acquisition.
Tick the VME and Readout checkboxes in order that these components are controlled via the main STOP, GO and SETUP buttons. This is the normal mode of working.
Tick the Tape Server Enabled checkbox if you wish the tape server to be controlled. You can however control the tape server state manually via the Tape Server window.
If you wish the data acquisition program to update your histograms using the acquired data then tick the Histogramming Enabled checkbox.
If you wish the event data written to tape or disc storage then tick the TS Transfer Enabled checkbox. The Tape Server must be in the GO state.